Share this
by Adam Knight on 29 August 2017
This article is republished from my original Setting up a new VSTS project post on fantail.io.
Visual Studio Team Services (VSTS) is an Application Lifecycle Management tool - it handles the whole lifecycle of software development from idea to requirements, planning, development, code reviews, build and release. It is designed to support your team no matter what methodologies or languages you use. While most users pay for a license or use their MSDN subscriptions to log in, Microsoft make VSTS freely available for teams of up to 5 users. I am going to use my free account to plan and develop a new project, and share some tips along the way.
Start off at VisualStudio.com where you can sign up for a free account. After you choose your account name, you can create a new project:

Choose a Git repository to save your source code, and select the Agile work item process. This process works well with most Agile methodologies without constraining you to a particular Scrum template. When you press Create you'll be taken to the new project's dashboard. It has a lot of information on it - your team members, information about code commits, prompts to set up a Readme file and Build Definitions and a menu with many, many options.

Taken from the left, the menu takes you to your account home where you can add more projects, then a drop-down where you can select different projects if you have them. Next comes some menus:
- Dashboards - An overview of what's going on in your project
- Code - A link to the Git repository info
- Work - Agile planning and requirements
- Build & Release - Continuous Integration and Deployments
- Test - All things Quality Control
- Wiki - A very convenient way of writing documentation and guides
- Configuration (a Cog) - Setup for your project.
Finally you get a search field, a Marketplace where you can get extensions, a feedback button and access to your profile. First off, click on your profile icon and select "My Profile". This takes you to a page where you can update your personal details. VSTS assumes you're in the U.S.A. and has date formats and time zones set accordingly. To change this, click Edit Profile then Preferences and you can set up your date/time formats.
My project will have a number of different services written in different languages, so I set up different Git repos to hold each service. To do this select the Code menu, then click on the Repo drop down:
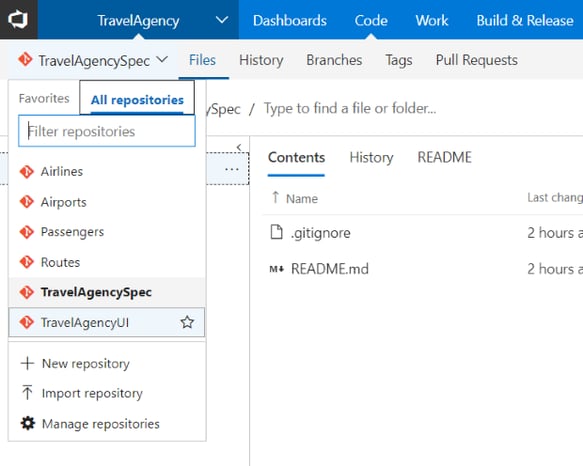
You can add, import and manage repos using the option, change which repo you're looking at and pin a repository as a favourite by clicking on its star. I have added a few, but there are more to come.
My next post will be about configuring the requirements board, to get it to suit my development style and project. See you then!
Adam Knight is an Auckland-based Senior Solution Architect in Equinox IT's Cloud business.